We’ve moved!

I’ve decided to hang up the WordPress blog and start hosting my blogs in Github. Github seems like an easier platform for developer-minded folks like myself, and I’d been getting annoyed with all the ads over here.

Check out my first post over there on patterns for responding to events in SharePoint Online: https://dgusoff.github.io/event-handling-sharepoint/

Send and Receive Text Messages from Microsoft Flow

As the software development landscape matures, levels of abstraction keep getting higher. Every generation of technology raises the starting point a notch, enabling developers to create more and more interesting things while “boilerplate” or setup tasks become increasingly automated.

Nowadays, with tools like Flow and Azure Logic Apps, we can create some pretty cool integrated solutions without even having to write code.

Microsoft Flow is becoming a go-to no-code tool for authoring business process automations in the Microsoft ecosystem, replacing the old SharePoint Designer tool we all hated so much. In this blog post we’ll explore sending and receiving text messages via Microsoft Flow and integrating them into other systems to create fast, mobile-ready business applications.

What you’ll need

You’ll need a few things set up in order to follow along:

  • You’ll need an Office 365 license that includes Flow and Email
  • You’ll need a Twilio account. You can create a free trial account that includes a set amount of free credit to play around with. Twilio is a paid service, so you’ll need to pay for using it in real applications, but the free trial comes with (I think) $15 dollars worth of credit, and you can send and receive a couple thousand text messages with that amount, so you don’t have to commit to anything until you’re sure about the solution.

Building the solution

We’ll follow four steps to build out our sample Flow:
1. Create a shell HTTP-triggered Flow
2. Set up a webhook for incoming texts against our Twilio number
3. Send ourselves an email with the text content
4. Send ourselves a text message repeating the incoming message back to us

Create an HTTP-Triggered Flow

Go to Flow and create a new Flow with an HTTP trigger. Use the Create From Blank template and search using “HTTP” until you find the “When an HTTP request is received” trigger, and select it.

alt text

Our trigger will populate on the design surface. We won’t be able to see the trigger’s URL until after we save the Flow, and we don’t know what the post body schema is going to be, so we’ll leave that blank for now. Also, we need at least one action before we can save the Flow, so let’s just create a variable to hold the POST body of the trigger request. We’ll use it to generate our schema after we invoke our webhook for the first time. I used the Initialize Variable action, named the variable “Body”, set its data type as Object, and initialized it to the “Body” element from the trigger request.

alt text

Now give your Flow a name and save it. I named mine “Twilio Trigger” and note that once the Flow saves, the URL is populated in the action. Put this on your clipboard as we’ll use it in the next step.

alt text

Set up our Webhook

Once you’ve set up your Twilio trial account, you’ll need to create a SMS Project and a phone number. I do not find Twilio’s user interface easy to use, and I usually have to stumble around a bit before I can get anything done. But you’ll need to create a new project of type “Programmable SMS” and create a new phone number inside that project. To create a new number, go to https://www.twilio.com/console/phone-numbers/incoming and click the plus sign to obtain a new number. Once you have the number, go ahead and click it.

Note: for trial accounts, you will only be able to send and receive texts between your Twilio number and the phone you use to set up the trial.

Once you’ve clicked the number, look for the “Messaging” section and look for the “A message comes in” line. Paste your Flow URL into the text box and leave the defaults on the two dropdowns (“Webhook” and “Post”), and click Save.

alt text

Your webhook is now pointing to your new Flow. Send a text message to the Twilio number from the phone you used to set up your trial, and navigate to the Flow you built earlier. If you’ve done everything correctly, you should see one successful run of your Flow.

alt text

If you do not see any runs, then your webhook is misconfigured. If you see a run and it’s failed, then something has gone wrong with the Flow.

Complete the Flow

But assuming all went well, if you drill into the Flow run you can see the POST data sent to the Flow in the Body variable we set up.

alt text

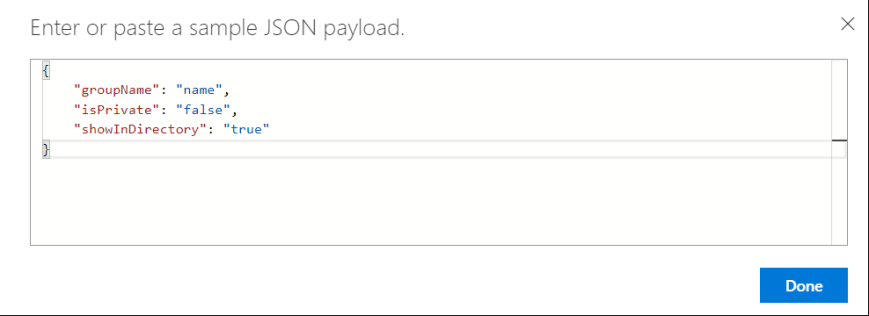
Next we’ll copy that text and use it to generate our expected body schema for the HTTP Trigger. Put the Flow in edit mode, open up the HTTP trigger, click “Use sample payload to generate schema”, and paste in the text from the Body variable:

alt text

That body JSON looks something like this:

{
"$content-type": "application/x-www-form-urlencoded",
"$content": "VG9Db3VudHJ5PVVTJlRvU3RhdGU9REMmUU2MDlhN2EyM2IwOWQ4MjQxNmU4NTg3OCZBY2NvdW50U2lkPUFDOGNlOTQwOTM1ZDU5MDBjY2YxNzdmMDQzZjc4NDgyYWEmRnJvbT0lMkIxNTE3Mjk1OTgwNiZBcGlWZXJzaW9uPTIwMTAtMDQtMDE=",
"$formdata": [
{
"key": "ToCountry",
"value": "US"
},
{
"key": "ToState",
"value": "DC"
},
{
"key": "SmsMessageSid",
"value": "SM11d18181e323232323d82416e85234"
},
{
"key": "NumMedia",
"value": "0"
},
{
"key": "ToCity",
"value": ""
},
{
"key": "FromZip",
"value": ""
},
{
"key": "SmsSid",
"value": "SM11d18181e609a74244242416e85987"
},
{
"key": "FromState",
"value": "MI"
},
{
"key": "SmsStatus",
"value": "received"
},
{
"key": "FromCity",
"value": ""
},
{
"key": "Body",
"value": "Hello there"
},
{
"key": "FromCountry",
"value": "US"
},
{
"key": "To",
"value": "+12028738201"
},
{
"key": "ToZip",
"value": ""
},
{
"key": "NumSegments",
"value": "1"
},
{
"key": "MessageSid",
"value": "SM11d18181e21212121212416e85456"
},
{
"key": "AccountSid",
"value": "ACxxxxxxxxxxxxxxxxxxa"
},
{
"key": "From",
"value": "+15172953322"
},
{
"key": "ApiVersion",
"value": "2010-04-01"
}
]
}

Notice that all the data we care about – namely the sender and the message itself – are buried in an array of key-value pairs. To get at this data from our Flow, we need to loop through all the pairs and check until we find what we’re looking for. It’s not ideal but it’ll work. What we’ll do is loop through the keys, look for the one named “Body”, store the value of Body in a variable.

We’ll add a condition step, and inside the “choose a value” box we’ll select “key” from the Dynamic Content selector. When we do this, Flow will automatially wrap that condition inside an Apply To Each iterator. When “Key” is equal to “Body” we’ll store the value in a string variable, and then outside the loop we’ll email the text message to ourselves, completing the Flow.

Here are the actions to complete the Flow:

alt text

alt text

alt text

Testing

Now let’s send another text to the Twilio number. If all goes well, the Flow trigger again and light up green, and you’ll have the text content in your Email inbox.

Sending Text Messages

Sending a text message is much more straightforward. There is a standard Twilio connector in Flow, and you need to set up your initial connection parameters before fleshing out the action. To do this we need to grab our account SID and your auth token. You can get these from the Twilio dashboard at http://www.twilio.com/console

alt text

Setting up the Twilio connector

The first time you set up any Twilio integrations in Flow you’ll be prompted to flesh out your connector with the Account ID and auth token. Add a new action, search for “Twilio” and select the “Send Text Message” action.

alt text

If this is the first Twilio integration you’ve done on your tenant, Flow will prompt you to set up your connector. Give it a name and enter your Account ID and Auth Token from the Twilio portal.

alt text

After configuring the connection you’ll be able to fill out the action details. The ‘From’ phone number will be a dropdown list of all the phone numbers associated with the account. The ‘To’ number is a plain text number, but if you have a trial account you’ll only be able to successfully message the number linked to your account, and the text is also a plain text field. Of course you can use Flow dynamic data and functions inside these text fields.

alt text

Possibilities

Having the ability to interact with text messaging in Flow opens up a wide range of possibilities. Flow is a connection machine, and enables us to integrate with a wide array of services. Throw in some Azure functions and the power of Azure service offerings and we can implement anything we can imagine: AI-driven chat bots, reservation systems, bulk reminders and notifications, social media monitoring, critical IT systems monitoring, just to name a few off the top of my head.

Conclusion

We can easily create mobile-ready integrations with Microsoft Flow that can send and receive text messages. Receiving text messages involves a webhook and a bit of setup, and sending text messages is a simple action out of the box.

Emailing a SharePoint Group from Flow, part 2: The custom connector

In Part One of this blog I showed how email all users from a SharePoint group using Microsoft Flow. In part two I’ll show how to reuse this Flow from other Flows using a Custom Connector.

The “Email a SharePoint Group” Flow from part one is a standalone Flow that does one thing – emailing the SharePoint group. It’s invoked via an HTTP trigger, which means that to consume it from another Flow, you need to wire up a Request action with the appropriate URL and POST data. This isn’t ideal for two reasons: It requires knowing the arcane details of the endpoint and how to set it up in a Flow, and it necessitates exposing the endpoint URL to anyone needing to use it from a Flow.

In this blog we’ll abstract away the details of that action by wrapping it in a Custom Connector.

In other words, we’re going to go from this:

alt text

to this:

alt text

What you’ll need

In order to follow along you’ll need the following:
1. The Flow you created in Part One
2. Postman (you can download it here: https://www.getpostman.com/

Creating the Custom Connector

There are a couple different ways to generate a Custom Connector for Flow. We’ll use a Postman collection to help us generate the API definition that Flow needs to set up the connector.

We’ll use the following data as the inputs for our Postman collection. Remember, our Flow is onvoked via HTTP request to: https://prod-23.westus.logic.azure.com:443/workflows/0184591fa2bd4547b5ed01046cb51d18/triggers/manual/paths/invoke?api-version=2016-06-01&sp=%2Ftriggers%2Fmanual%2Frun&sv=1.0&sig=qdPtgtY0Rn8vBAYNBLeISLh_I2s1etjWw7QrOZ_TO8Q

POST Body:

{
"siteUrl": "https://mytenant.sharepoint.com/sites/Home",
"groupName": "Home Members"
}

I won’t go into detail about how to create a Postman collection, (you can read about it here), but in a nutshell you’ll want to set up your POST request to your Flow URL and add the JSON to the body. Don’t forget to set the Content-Type to application/json, and choose to export a V1 collection version.

alt text

Once you’ve exported the collection, you’ll be ready to move into Flow and set up the custom connector.

Setting up the Custom Connector

In Flow, click the gear icon in the top bar and select “Custom Connectors”, then “Create Custom Connector” and select “Import a Postman Collection”.

Once the collection imports, you’ll see a four-step wizard where you’ll configure your connector.

In step 1, General, you have options to change the default color and logo. You can accept the defaults or set a custom look for the connector. We’ll stick with the defaults here.

alt text

In step 2, Authentication Type, leave the default at “No Authentication”

alt text

Step 3, Definition, is the most involved. Here you can tweak your actions and add new ones. We’ll have one action already defined, and you’ll see the four query string parameters passed into the POST request. We’ll want to hide these from the Flow author, so we’ll click on each one, select “Edit”, and set its visibility to “Internal”

alt text

alt text

Step 4, Test, will require we click the “Create Connector” button and actually consume the connector. We should see all our parameters, and if we add an appropriate POST body and click “Test Operation”, we should get a 202 response back. Also we should see that our souce Flow was triggered and ran successfully.

Create the Flow

Now we’re ready to create our Flow and consume the custom connector. Here I’ll just create a Button-triggered Flow and search my actions using the word “Email”. You’ll see I got two custom connectors back because I created two of them in my dev sandbox.

alt text

When you configure the action it’ll prompt you for a site url and a group name where the email will be sent. If I had set the visibility of the Content-Type parameter to “Hidden” that would have been gone from the interface as well.

alt text

Now you have a custom connector that you can re-use in all your flows to email any SharePoint group in any site your Flow author has access to. You also have a pattern for creating sub-Flows and a way to execute them in a scalable manner.

Homework

Try to create your own custom connector to email a SharePoint group. Pass the subject line and email body as parameters. Let me know how it went in the comments.

Email a SharePoint group from a Flow, Part 1

One of the greatest features of Flow is the ability to send emails. But there isn’t a native way to send emails to SharePoint groups. Anyone who’s done substantial work with workflows knows that emailing individual users is fraught with issues. People leave companies or change roles, and if a workflow explicitly names an individual as an email recipient, any personnel change will break existing processes, necessitating rework. The best practice in this situation is to email a group, and manage group membership as needed.

Flow doesn’t allow an action to do this, and based on this Tech Community conversation lots of people are asking for it. Recently Microsoft provided the ability to issue raw REST requests against SharePoint from a Flow, and indeed we can use this pattern to fetch users from a group. Once we have that list of users we can them email them using Flow.

Creating a reusable Flow

I’m going to do something a little different with this Flow. I have a number of situations where I need to email SharePoint groups, and I don’t want to have to do this work every time the requirement comes up. What I’m going to do instead is create a standalone Flow that only emails a group, that I can call from other Flows.

One way to do this is to author the Flow using an HTTP trigger. That is, the Flow will listen on an HTTP endpoint, and be invoked whenever a request is made to it. The advantage of this trigger is that it can be invoked from pretty much anywhere: another Flow, an Azure Function, a console app, a mobile app, Postman, anything that can issue web requests can take advantage of this service.

Because we want this Flow to be flexible and configurable, able to email any group on any site in our tenant, we’re going to pass in the name of the group and the site URL to the Flow via JSON. Here’s how the Flow trigger looks so far:

alt text

Use this sample payload to generate the JSON schema:

{
"siteUrl": "foo",
"groupName": "foo"
}

Setting up the REST Request

Like I mentioned earlier, Flow gives us the ability to issue REST requests against SharePoint. If you’ve never worked with REST or with web services in general, it might seem a little daunting. But in Flow, the most difficult part of the process, authentication, is already handled for you, so all you have to do is craft the requests and parse the responses. Flows run under the security context of the user who authored the Flow, and the authentication headers will be automatically provided by Flow. (Note – there are some security implications to consider when authoring Flows – I’ll discuss those at the end of this article.)

If you’re not already familiar with the SharePoint REST interface, take a few minutes to read up on the user, group, and role REST documentation from Microsoft: https://msdn.microsoft.com/en-us/library/office/dn531432.aspx.

We have some options around how to specify the group we’re using – either by its name or by its numeric ID. We’ll be using the group name in this example, because it seems like it would be a little more user friendly. Our REST request is going to query for all the users inside the group specified in the request, inside the site specified by the request. It’s going to look like this:

GET /_api/web/sitegroups/getbyname()/users

Now, drop a “Send an HTTP request to SharePoint” action onto the diesign view after the trigger. Set it up like this:

alt text

OK, so now we’ve set up out trigger and used the data sent to it to invoke a call to SharePoint’s REST interface, which will return the serialized user data as a string. Next we need to transform that into structured data the Flow can use.

Parse the JSON

Now we’ve retrieved the data from SharePoint representing the group users. But the Flow only sees this as a string, even though it’s JSON structured data. We need to tell the Flow to treat this as structured JSON, and to do this, we need the Parse JSON Action.

So, after the SharePoint HTTP call, drop a Parse JSON action onto your design surface. Set it up to use the Body from the SharePoint HTTP call as its content. For the schema, click the “use sample payload” link and paste this into it:

{
    "d": {
      "results": [
        {               
          "Email": "AdeleV@mytenant.OnMicrosoft.com"
        }
      ]
    }
}

So now your Parse JSON action looks like this:

alt text

Build the recipients string

A collection of recipients in a Flow Email action is represented by a semicolon delimited list of email addresses. Since we now have an JSON array of objects containing these addresses, we now need to loop through the results and add the delimited email addresses into a string variable.

First, let’s create the variable and initialize it to an empty string:

alt text

Next we need to loop through the results array. Do do this we add an “Apply to Each” action. This action is a little tough to find – you’ll find it in the “more” section when you add an action to the end of your Flow:

alt text

You’ll add as the input to this action the output from the Parse JSON action you set up earlier. It should be called “value”. Inside the loop we’ll put an “Append to String Variable” action, adding the “Email” property from the passed array, and adding a semicolon at the end.

alt text

Set up the email action

Now we’re getting close. We have our delimited recipient string pulled from a live SharePoint group, and we’re ready to wire up the Email action.

Add an “Office 365 Outlook – Send Email” action to the end of your Flow. Add your string variable on the “To” line. Fill out the values for Subject and Body (you can parameterize these as well if you need to. I’ll leave that implementation up to you).

alt text

Test the Flow

Now everything is wired up, and we can test this out. Since we have an HTTP-triggered Flow, we can use Fiddler or Postman to execute requests directly to the Flow. I like to use the VS Code “REST Client” extension (https://marketplace.visualstudio.com/items?itemName=humao.rest-client) since it’s easy to use and I almost always have VS Code up and running anyway. We can grab the URL from the HTTP Trigger definition:

alt text

And here’s how we wire up the request in VS Code (Clicking “send request” will do what it says):

alt text

If your Flow and request were wired up successfully you should get a 202 response back, and we should be able to see our executed Flow in the history section. Here we can see the inputs and outputs of each action and whether it secceeded or failed, and usually if we did something wrong it’ll be obvious here.

alt text

If your Flow succeeded your recipients ought to have the email in their inboxes.

Call from another Flow

OK, now we have a working Flow that emails a SharePoint group. Now we want to reuse this Flow by calling it from other Flows. To do this we use within that Flow a Request action. Set up the URL and JSON in that action, run it, and if everything is done right, you’ve got a solution to email a SharePoint group that you can use in any of your Flows.

alt text

About those security implications

You should be logged in using a “service account” when authoring Flows. If you create the Flow using your normal user account, three things will happen. First, the emails will appear to be coming from yout user account; second, the Flow will assume the security context of your account, which means it’ll break if your account’s permissions con’t perform the actions against the specified site. If you leave the company all your Flows will break. And third, it will be difficult for your colleagues to maintain or even find the Flows you’ve written.

So create a “Flow Author” licensed account for this purpose. You can name it whatever makes sense to your organization.

Thinking ahead

It would be great – and a lot easier to use – if we could wrap this Flow into a Custom Connector rather than manually wiring up the HTTP request. And that’s exactly what we’re going to do in Part 2. Stay tuned!

Scheduled Item Publishing in Modern SharePoint Site Pages

For those of us used to the rich content publishing features in the old “Classic” SharePoint Publishing model, the new Modern experience takes a little getting used to. For example, until very recently there wasn’t much at all in the way of content approval to say nothing of the more advanced features like scheduled item publishing. This month (August 2018) Microsoft announced a new solution for page approvals utilizing Flow under the covers, which promises to enable the sort of functionality we were used to in Classic publishing sites.

One of the Classic features my client use all the time is scheduled item publishing. In Classic Publishing libraries, this was a setting on the library that allowed content approvers to set a date and time when the page would be published, and it worked pretty well. This feature is missing on Modern, but with the new Flow capability, we can bring it back.

Enabling the Approval Flow

On the Modern Site Pages library, in the Flow dropdown, we not have the option “Configure Page Approval Flow”.

Configure Page Approval

If we choose the option to do this we get a slide out panel that allows us to set up our list of approvers.

List of Approvers

List Approvers

Flow Created

Now, once we’ve done this, we get the option to “Submit For Approval”. Clicking this option opens an initiation form where we can kick off the approval process. The users specified in the flow configuration will get the Approval email, and on approval the page will get published.

Updating the Flow to support scheduled item publishing

To enable scheduled item publishing we need to do two things. First, we need a way to specify the date on which we want to publish. An easy way to do this is to add a Date field onto the Site Pages library. Use a custom content type that inerits from Site Page add this field there.

The second thing we need to do is modify the Flow to add a “Delay Until” action, using the Date field we added to our content type. We’ll put this inside the “Yes” branch of the condition that follows the approval result. It looks something like this:

Delay Until

Now, when we submit a page for approval, we can see the Flow waiting until the publish date and time before proceeding on to publish the page.

Delaying

Some things to be aware of

All in all, this process works pretty well, but the whole Approval Flow business has some rough edges, and some things that don’t quite work as well as they should.

There’s no way to see configured Approval Flows for a library.

SharePoint will happily allow you to configure many approval Flows on a single library, because the UI has no way to show you the Flow(s) that have already been configured. Unless there’s a way I’m not aware of, the only way to see your approval Flow is to go directly to Flow and pick your Flow from the list. Which can be a problem, especially considering…

Flows don’t scale well.

If you have 200 sites, you’ll need to configure 200 separate instances of the Approval Flow. Obviously this is a governance and maintenance nightmare, and woe be upon the person who has to do all this grunt work, because Flow creation is not easily automated. One possibility might be to create a master Flow that all the other Flows call via HTTP request, and simply update each Approval Flow to launch that.

You’re stuck naming individual people as approvers, no SharePoint or AD groups

The UI doesn’t allow for this, but the approval email actions don’t allow this, so I think that’s the cause of the limitation. We can do a little more work inside the Flow to fetch a SharePoint group but that’s maybe a topic for another time.

Flows crap out after 30 days

If 30 days transpire after the invocation of a Flow, the Flow will just stop working. This seems to be a hard limit. So when submitting your Approval Flows, be aware of this limitation.

Wrapping it up

SharePoint’s Modern initiative replaced a mature, battle-hardened system in Classic Publishing, and naturally there would be some functionality gaps to close. Microsoft is working quickly to address this, and it seems reasonable to expect further evelopments along this path. For now, at least we now have a way to deliver scheduled item publishing to our clients in Modern SharePoint.

I’ll be speaking at the SE Michigan PowerApps/Flow User Group Sept 10

I’ll be speaking at the Southeast Michigan PowerApps/Flow user group, September 10 at 5:00, at the Rightpoint offices in Royal Oak.

I’ll be giving a brief introduction to connectors, triggers, and actions in Flow, and talk about how to create your own integrations using raw HTTP actions and converting those into custom actions and connectors. I’ll also demo some real-world implementations of things I’ve done in Flow using this pattern.

Hope to see you there!

Meetup:

SE Michigan PowerApps/Flow User Group meet up

Monday, Sep 10, 2018, 5:00 PM

Rightpoint
909 South Main St, Royal Oak, MI Royal Oak, mi

7 Members Attending

Hello Everyone, Hope you are having a great summer! It’s time for our next meet up on Monday, September 10. We have some exciting topics to talk about. Agenda • Check in/Snacks • Welcome • PowerApps Customer Success story from Rightpoint – Sreeni A We will talk about an app with demo that helps field workers complete a report for the job they worke…

Check out this Meetup →

Venue:
https://binged.it/2wrIH1K

Copy Link in Modern SharePoint – non-obvious security implications you should know about

Recently I encountered a strange issue in a client’s Intranet during the content buildout phase. They’d given read-only access to a group of pilot users, and loaded up their site with pages and links to documents. Then they began to notice that these pilot users appeared to have the ability to delete the documents, and logged a bug with us.

We discovered that the document library had hundreds of files with broken permission inheritance, and that the Everyone principal had been granted Contribute permission on each one of these documents, meaning they could edit and even delete the documents.

Thinking that some rogue user had inadvertently (or “advertently”) shared those documents in error, we ran a script that looped through all the documents in each library and restored the permission inheritance on each one. Then we discovered that the several hundred or so hyperlinks to the documents throughout the system began returning 404s.

Eventually we tracked the issue down to a “feature” of the Copy Link action bar item in Modern SharePoint document libraries. We discovered that Copy Link does a bit more than merely return a link to the document to the user’s clipboard.

The Document Action Bar

My client had been using SharePoint’s Copy Link functionality to create those links, just as we had taught them to. But what we didn’t realize was that clicking Copy Link was actually breaking the security inheritance on the document, and sharing it to the entire company. This was because the tenant settings that drove this functionality were left in their default settings, which inexplicably default to the most permissive – the most insecure – setting.

Check out what happens when you click the button:

Copy Link Dialog

Once you see this dialog, permission inheritance has already been broken and the permission “Anyone with the link can edit” has already been applied. If you select another option, the permission will update – even to the point of reinstating permission inheritance if “People With Existing Access” is selected. Also, the link regenerates, and previously generated links become stale and return 404s.

Copy Link Options

The link structure will tell the sharing story

If a Copy Link operation results in broken inheritance, it will look different from a link that does not.

A Sharing Link looks like this:
https://m365x692092.sharepoint.com/:w:/g/Ea90HDWefS1BnLLgtVkMNJgBdpUI6LiBC7Kw4pj0g-CIAQ?e=troe2t

..while a non-shared link will look like this:
https://m365x692092.sharepoint.com/:w:/r/Shared%20Documents/CAS/Marketing%20Strategy%20Future.docx?d=w351c74af7d9e412d9cb2e0b5590c3498&csf=1&e=TWfoVC

Note that a sharing link shows the tenant followed by a long string of crap, and the non-sharing link, while also containing its share of trailing junk, also seems to incorporate a physical path as part of its structure. So using this pattern you should be able to tell if a Copy Link resulted in broken inheritance.

My thoughts on this

You have some options for setting the default behavior of this function, but like I said the default default is the most permissive. The decision to have it behave this way vexes me somewhat. In previous versions of SharePoint it’s been difficult and tedious to break permission inheritance through the UI, and I think it ought to be that way. Breaking inheritance should only be done with serious consideration as it’s difficult to support and also has performance implications – a Microsoft employee once told me that breaking inheritance “makes SQL cry”. Maybe in the cloud we care less about performance implications because all that stuff is abstracted away. But it’s still there and I’d have to believe Microsoft cares about its servers. Anyway…

Know your tenant settings

We can manage the tenant-wide default behavior for Copy Link by navigating directly to https://-admin.sharepoint.com/_layouts/15/online/ExternalSharing.aspx

There are a number of settings related to Sharing on this page but the ones we care about are under the headings “Default Link Type” and “Default Link Permission”. The defaults look like this.

Tenant Settings

Note that in the Copy Link dialog we had four options for how to share the link, and the tenant setting only allows for three, excluding, maddeningly, the “People with Existing Access” option, the one I think should be the default. If we select the “Direct – specific people” option, though, and just not actually specify any people, the result will be the same.

The “Use shorter links” option only substitutes the “guestaccess.aspx” url with the crypic sharing url we saw earlier, nothing really to see there. The Default Link Permission setting, if set to Read, will at least limit the damage done if files are inadvertently shared to the general population.

Manipulating the settings using PowerShell

Of course these settings can be set using PowerShell at both the Tenant and Site Collection level. The Site Collection level settings will override the Tenant level settings for the site in question. Check out the documentation for Set-SPOTenant and Set-SPOSite. The options you want to look into are, on both commands, DefaultSharingLinkType and DefaultSharingLinkType. Make sure to check out the other settings related to sharing just to get a feel for how they work.


The SharePoint Modernization Scanner

While spelunking through Github this week I came across a useful tool in the PNP Tools repo that can generate some pretty interesting data about your Office 365 tenant.

It’s called the SharePoint Modernization Scanner, and it claims to grease the skids for your movement to Modern and Group-ification of your existing sites.

The complete source code is there but they’ve also included a direct link to the executable if you’re not interested in building it and just want to run the darn thing, which is what I did against a few of my tenants.

Running the darn thing

The default configuration for the tool uses a Client ID and Secret for a tenant-scoped App to authenticate into the tenant, which is pretty smart because it’s not guaranteed that admin user accounts will have access to all sites, even with policies in place to enforce it. (It’s the real world, things happen)  So, before you can run this you’ll want to make sure you have such an app and have the client ID and secret. You can also use normal credentials, just be aware of the access issue.

In order to make it work you’ll need to grab a file called webpartmapping.xml from the source code and drop it into the same directory where you’ve downloaded the executable.  Then open a PowerShell session and CD into that directory and run something like this:

./SharePoint.Modernization.Scanner.exe -t tenantname -i {client_id} -s {client_secret}

(Documentation)

The process will run for a while, depending on how much stuff is in your tenant. On one of my tenants with 400 site collections, it took about 15 minutes to run, and when it’s done, I got a nice collection of CSV files:

scannerResults

With this data we can see every site, its template, the deployed custom actions, and detailed information about every page and web part in the tenant.

Remote Event Receivers – you’re all doing it wrong

Remote Event Receivers are a powerful way to integrate custom code into your SharePoint Online environment.  Essentially a Remote Event Receiver is a hook that allows you to execute your code in response to an event that occurs in SharePoint.  There are several techniques for responding to events in SharePoint Online, but the Remote Event Receiver is the most powerful. It offers dozens of different events to attach to and allows you to configure synchronously or asynchronously. It is also very easy to attach, develop, deploy, test, and maintain. Is also very misunderstood.

Remote Event Receivers were introduced along with SharePoint 2013 and the arrival of the App model. Microsoft provided tooling with Visual Studio to create Remote Event Receivers, but unfortunately the only way to expose this tooling was in the context of a Provider-Hosted App.

This is unfortunate because Remote Event Receivers have nothing to do with Provider-Hosted Apps. In order to develop a Remote Event Receiver using the Microsoft-provided tooling, a developer had to create a Provider-Hosted App project and deploy their RER along with it. This added a great deal of complexity to the development effort, and made packaging and deployment a painful and tedious experience.

To further complicate things, Microsoft decided to wire up a WCF service as the endpoint in its RER tooling. This is sheer lunacy, even back in 2013. A web API project would have been simpler and would be more in line with Microsoft development tooling efforts. The opacity and complexity of WCF made RER development even more cumbersome. Actually, I believe they decided to use the WCF service so the development experience would be similar to that of old-school Event Receivers, with the ability to use a deserialized Event Properties object.

Building a Remote Event Receiver is Easy

In truth, it is remarkably simple to configure, develop, deploy, and maintain a Remote Event Receiver, but in order to do so you must completely abandon the Microsoft tooling and just set up the pieces yourself. Luckily there are really only two components to a Remote Event Receiver:

  • The endpoint
  • The registration

The registration is where you tell SharePoint, “call this endpoint every time this event occurs”. The CSOM provides mechanisms for adding Remote Event Receivers, but the details depend somewhat on the type of event receiver being deployed. The  PnP PowerShell library provides the ability to register a Remote Event Receiver in a one-liner. For example, to set up an RER that is invoked every time an item is updated on a list, execute:

Add-PnPEventReceiver -List "Tasks" -Name "TasksRER" -Url https://my-rer.azurewebsites.net/Service1.svc -EventReceiverType ItemAdded -Synchronization Asynchronous

More about registering Remote Event Receivers

The endpoint is just a web service listening at a certain URL, and you have lots of options for this. A Web API project would work great for this. Azure Functions are also a very compelling option. You are also free to write services in Java, Node or whatever other technology you can think of. In the example below, we’ll use the canonical WCF Service you’d get with the Visual Studio item template, but we’re going to sidestep the template and wire things up ourselves. It’s actually easier this way.


Creating the Remote Event Receiver shell

In Visual Studio,

  1.  create an empty ASP.NET web application
  2. Add the Nuget Package ”AppForSharePointOnlineWebToolkit”.
  3. Add a new item of type WCF Service to the web app.
  4. Get rid of the IService reference and set your service to implement IRemoteEventService, which lives in the Microsoft.SharePoint.Client.EventReceivers namespace. This namespace came into the project with the Nuget packages we added earlier. Resolve the squiggly to implement the interface stubs.

Your service class should look something like this:

RER-stub

F5 your project and navigate to the service to make sure it’s accepting requests. Take note of the port number.  We’ll need that to set up our proxy for local debugging.

Locally debugging your remote event receiver

To test this event receiver locally, we’ll use ngrok. According to its documentation, “ngrok is a reverse proxy that creates a secure tunnel from a public endpoint to a locally running web service.”  We will use it to map an Internet endpoint to our local machine so we can intercept and debug requests coming from SharePoint Online.

Assuming you have installed Node.JS and ngrok, create your proxy by executing the following. 56754 is the port number hosting my local WCF service.

ngrok-1

Once it connects it’ll output some data, including the public URL of our proxy connection:

ngrok-2

Next, open up a browser and navigate to the ngrok URL, append the service endpoint, and you should be able to see that the ngrok URL is returning your service.

ngrok-3


Next we’ll attach our event receiver to a SharePoint list. Using the PnP PowerShell cmdlet shown above, we’ll add a Remote Event Receiver to our site. Make sure to open a new PowerShell session for this and leave the ngrok session running in its window. The proxy will be released when the window is closed.

Now, set a breakpoint in your ProcessOneWayEvent method, add a task to the list and make an edit to it.  If all goes well your local web service will be called and the breakpoint will hit:

rer-2

Make sure you closely inspect the properties object in the debugger, and get a feel for all the data that’s in there. For this particular event we’ll want to check out ItemEventProperties and ItemEventProperties.AfterProperties for some useful metadata that gets passed into the service.

Deploying your Remote Event Receiver to Azure

When you are ready to deploy to the Internet you can deploy to Azure just like a normal web application. You’ll want to run Add-PnPEventReceiver using the Internet URL to register your event receiver for real, of course.


Create a Yammer Group with Microsoft Flow

Microsoft Flow is a fantastic enterprise tool and comes with hundreds of default actions, which allow you to easily perform integrations to different services, including Yammer.

Flow gives us several actions out of the box that we can use to perform integration activities against Yammer:

1

These actions pretty much revolve around fetching and creating messages. True, this is the core thing we do in Yammer, but sometimes our requirements force us to step outside the default capabilities of our platforms and think of creative ways to solve complex problems.

We do a lot of Yammer integrations in our solutions at Rightpoint, and creating a Yammer group is something we do all the time. As we’ve seen, Flow doesn’t give us an action to create Yammer groups, but there is a Yammer API that will do this, and it can be very easily executed via Flow. (Technically speaking, the API to create Yammer groups is an undocumented API. We’ll discuss what that means a little later.)

We’re going to achieve this by POST-ing the necessary data to a Yammer API endpoint, using Flow’s HTTP action.  The HTTP action is, in my opinion, the most powerful and flexible Flow component. It’s so powerful because we can literally do anything we want.  At a low enough level of abstraction, every action is an HTTP action anyway.

Authenticating to Yammer

The Yammer API uses Oauth tokens to authenticate, so before we start our Flow we’ll need to create an app in Yammer. Navigate to https: //www.yammer.com/YOUR_ORG_NAME/client_applications, and click the green “Register New App” button.

On the “Register New App” screen, fill out the required fields. Absolutely none of the fields in this form have any bearing whatsoever on what we’re doing. If you’re planning to build a web app and publish it in the global Yammer app marketplace, these fields will be needed, but 99.9% of the time they’re pointless. But they’re required fields, so put in whatever will allow the validation to pass.

2

What we’re really after is the Oauth token. When we save our app, we’ll be redirected to a configuration page where we’ll see the Client ID and Client Secret. By clicking the “Generate a developer token” link, we will expose the app’s token. Don’t worry about the text claiming that this is for testing purposes; they’re still assuming you’re building web apps for the global store. Auth tokens in that case are generated on the client side for each user.

3

Won’t this Auth token expire?

Yammer app tokens last a long time, although Yammer won’t disclose exactly what the expiration terms are. I can say that I’ve had Yammer integrations authenticating in this fashion since about 2014, and I’ve never seen one expire. They can be revoked, however, and the account that created the app has the ability to do this.

Yammer Apps – other considerations

There are a few things you’ll want to know as you develop Yammer apps in this fashion:

  • Anyone can create a Yammer App. You don’t need to be an administrator to do this.
  • Yammer Apps execute under the security context of the creating user account. Content created by the app will appear to have been created by the user that created the app. Think of it this way: through the auth token the app author is delegating their access to anyone who holds it.
  • If your token is compromised you can invalidate it by navigating to yammer.com/YOUR_ORG_NAME/account/applications and click the “Revoke Access” link next to your app.
  • Consider using a dedicated “Service Account” for creation of Yammer Apps. Not only does this protect your user account should the token get compromised, it ensures the token continues to work should your account get disabled – for example, if you leave the organization.

Understanding the Yammer group creation API

If you do any work with the Yammer API, you’ll want to check out the Yammer API documentation.

There you’ll find more detailed information about using the API, and you’ll see a listing of all the supported endpoints exposed via the API.

Notice that there is no listed endpoint to create groups. This is because the group creation endpoint is undocumented. Something to consider when working with undocumented endpoints is that Yammer is not bound to provide support for it, nor will they feel obliged to maintain backward compatibility should they ever decide to update their APIs. So there’s an element of risk to working with these endpoints, and you should be prepared to accept that one morning you might wake up to find that all your stuff is broken.  I would counter that by saying Office 365 often imposes breaking changes even on supported stuff, and these APIs have been stable for a number of years running.

The endpoint we use to create groups in Yammer looks like this:

https://www.yammer.com/api/v1/groups.json?name=GROUP_NAME&private=false&show_in_directory=true

We will POST to this URL, add a content-type of application/json, and add the Yammer Auth token as a bearer token, and leave the body empty.  The parameters should be self-evident, and the last two are optional, and they default to a public, listed group.

Let’s test this out. We can use Fiddler or Postman for this, but I’ve recently discovered the Visual Studio Code REST Client extension, and that’s what I’ll be using here. You can read more about it here.

Set your request to look like this:

4

It’s a simple as that. If you did everything right, you should get a 202 response back and your new group will be shown in Yammer, along with a notification sent to All Company:

5

Remember, you’ll want to use a service identity, which I didn’t do in this case.

Creating our Flow

Now that we’ve figured out how to post to Yammer using the raw API, let’s incorporate that into a Flow. In my Flow I’m going to use an HTTP trigger, so I can call this as a service from other applications or even from other Flows.  We’re going to pass three parameters into our Flow trigger, groupName, isPrivate, and showInDirectory.  We’ll use the sample JSON option to generate the request body our trigger will be expecting:

6

Next we’ll create a variable to construct our REST API URL. Its configuration, using the same URL structure we discussed before, using the Trigger Body JSON to flesh out the parameters, will look like this:

7.png

Now we can create and configure our HTTP action:

8

Now, assuming we’ve hooked everything up properly, we can call our Flow. I’ll be using the VS Code extension again just to keep things simple:

9

If all goes well we’ll get a 201 response and our group will be present in Yammer:

10

Note that I passed in parameters to create a private, unlisted group, and you can see this group is private and won’t be listed in the Groups list on Yammer. Also, it doesn’t create the notification message in All Company. Note that the creation of public unlisted groups is unsupported and will cause an error response to be thrown.

Wrapping it up

In this post I showed a technique for integrating the Yammer API with Microsoft Flow, and used it to create groups in Yammer.  Using Flow’s HTTP actions we can do just about anything that can be done over HTTP.  For more info on the Yammer REST APIs, check out their official documentation.